
Safety Precautions
Ensure only licensed personnel handle installation to prevent damage, injury, or system malfunction․ Always follow this manual’s instructions and recognize safety symbols and labels․ Use personal protective equipment․
1․1․ General Safety Guidelines
These guidelines are crucial for ensuring a safe and successful installation of the Goodman GSXC7 air conditioner․ Only qualified HVAC technicians should perform the installation, as improper handling can lead to injury or equipment damage․ Always adhere to the instructions provided in this manual and recognize all safety symbols and labels․ Use personal protective equipment, such as gloves and safety glasses, when handling components․ Ensure power is disconnected before starting any work, and avoid unsafe practices that could result in system malfunctions or personal harm․
1․2․ Warning Labels and Symbols
Warning labels and symbols are provided to indicate immediate or potential safety hazards during the installation and operation of the GSXC7 air conditioner․ These labels and symbols must be strictly adhered to ensure personal safety and prevent equipment damage․ Failure to recognize or comply with these warnings may result in serious injury, death, or system malfunction․ Always review the manual to understand the meaning of each symbol and label before proceeding with any task․
1․3․ Personal Protective Equipment
Wearing appropriate personal protective equipment (PPE) is essential during the installation of the GSXC7 air conditioner․ This includes safety glasses, gloves, and a face mask to protect against potential hazards such as sharp edges, electrical components, and refrigerant exposure․ Proper PPE ensures the installer’s safety and prevents accidents․ Always maintain a safe working environment and adhere to safety guidelines outlined in this manual to minimize risks during the installation process․
System Overview
The Goodman GSXC7 series offers high-efficiency cooling with up to 17․2 SEER2 performance, utilizing R-410A refrigerant for environmental sustainability․ It features advanced two-stage operation for optimal comfort and reduced noise levels, ensuring reliable and energy-efficient cooling solutions for residential applications․
2․1․ Key Features of the GSXC7 Series
The Goodman GSXC7 series stands out with its high-efficiency design, achieving up to 17․2 SEER2 performance, which ensures significant energy savings․ It operates on the environmentally friendly R-410A refrigerant, contributing to ozone layer protection and reduced environmental impact․ The system features a two-stage compressor, which provides precise temperature control and minimized noise levels․ Additionally, it offers a durable construction with a galvanized steel cabinet and a louvered grille, ensuring long-lasting performance and reliability․ These features make the GSXC7 series a top choice for residential cooling needs․
2․2․ Technical Specifications
The Goodman GSXC7 series offers a SEER2 rating of up to 17․2, ensuring high energy efficiency․ It operates with the eco-friendly R-410A refrigerant, supporting environmental sustainability․ Available in sizes ranging from 2 to 5 tons, this system is suitable for various residential cooling needs․ The two-stage compressor provides precise temperature control and reduced noise levels․ With an Energy Star certification, the GSXC7 series meets rigorous energy efficiency standards, combining reliability, performance, and cost-effectiveness in a durable, compact design․
2․3․ Environmental Benefits (R-410A Refrigerant)
The GSXC7 series utilizes R-410A refrigerant, a more environmentally friendly option compared to older refrigerants․ R-410A does not contribute to ozone depletion, aligning with global sustainability efforts․ This refrigerant is non-toxic and requires less lubricant, enhancing system efficiency․ By using R-410A, the GSXC7 series supports energy conservation and reduces greenhouse gas emissions, making it a responsible choice for eco-conscious homeowners and HVAC professionals alike․ This innovation contributes to a greener environment while maintaining superior cooling performance and reliability․

Installation Requirements
Proper installation requires adherence to site preparation, compatibility checks, and local regulations․ Ensure all prerequisites are met for a safe and efficient setup, as detailed in subsequent sections․
3․1․ Site Preparation
Ensure the installation site is level, well-drained, and clear of debris․ The area must be accessible and large enough to accommodate the unit and tools․ Verify the location complies with local building codes and manufacturer recommendations․ Properly secure the unit to prevent vibration and ensure stability․ Protect the site from environmental factors like direct sunlight or water accumulation․ Use manufacturer-recommended materials for base preparation to guarantee a stable foundation․ Always follow safety guidelines during site preparation to avoid accidents and ensure a smooth installation process․
3․2․ Compatibility with Existing Systems
Ensure the GSXC7 system is compatible with existing HVAC components, such as thermostats, ductwork, and electrical systems․ Verify that the refrigerant lines and connectors match the specifications outlined in the manual․ Compatibility with R-410A refrigerant is crucial to maintain system performance․ Check that the electrical supply meets the unit’s requirements․ Ensure the thermostat is compatible with the system’s two-stage operation for optimal functionality․ Proper compatibility ensures seamless integration and efficient system performance, avoiding potential operational issues or reduced efficiency․
3․3․ Local Building Codes and Regulations
Compliance with local building codes and regulations is essential for a lawful and safe installation․ Verify that the GSXC7 system meets all relevant local standards, including zoning laws and environmental regulations․ Obtain necessary permits before starting the installation․ Ensure all work aligns with regional electrical and HVAC codes․ Failure to comply may result in legal penalties or safety hazards․ Additionally, check for any specific requirements related to R-410A refrigerant handling and disposal in your area․
Tools and Materials Needed
Essential tools and materials include vacuum pump, manifold gauge, tubing cutter, refrigerant-grade copper tubing, insulation, and connectors․ Ensure all items are available before starting installation․
- Vacuum pump
- Manifold gauge
- Tubing cutter
- Refrigerant-grade copper tubing
- Insulation
- Connectors
4․1․ Essential Tools for Installation
To ensure a smooth installation of the GSXC7 system, gather essential tools like a vacuum pump, manifold gauge, tubing cutter, and refrigerant-grade copper tubing․ These tools are critical for handling refrigerant lines and ensuring proper connections․ Additionally, have insulation and appropriate connectors ready to maintain system efficiency․ Make sure all tools are in good condition and suitable for the specific tasks outlined in the installation process․ Proper preparation of these tools will streamline the installation and minimize potential issues․
4․2․ Required Materials
For the GSXC7 installation, essential materials include refrigerant-grade copper tubing, insulation, and compatible connectors․ Ensure all materials meet system specifications for efficiency and safety․ Properly sized tubing and insulation are critical for maintaining optimal performance and preventing refrigerant leaks․ Additionally, sealants and protective covers may be necessary to safeguard components during installation․ Using high-quality materials ensures a reliable and durable system, adhering to manufacturer guidelines for the GSXC7 series․
4․3․ Optional Accessories
Optional accessories for the GSXC7 installation may include programmable thermostats, condenser pads, or drain pan float switches․ These items enhance system performance and convenience․ Programmable thermostats allow for precise temperature control and energy savings․ Condenser pads improve stability and reduce vibration, while drain pan switches provide overflow protection․ Additional accessories like line set covers or insulation sleeves can protect refrigerant lines from environmental factors․ These optional components offer added functionality and protection but are not required for basic operation․
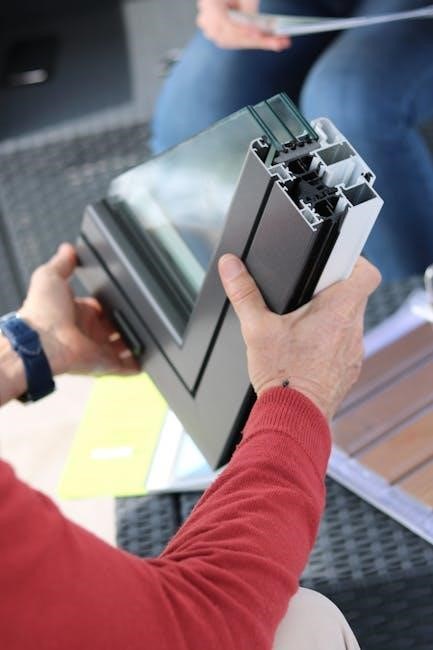
Condenser Unit Installation
Unpack and inspect the condenser unit for damage․ Mount it securely on a level surface, ensuring proper airflow․ Connect refrigerant lines according to the manual’s guidelines․
5․1․ Unpacking and Inspecting the Unit
Begin by carefully unpacking the condenser unit from its packaging, ensuring no damage occurs during the process․ Inspect the unit for any signs of damage, such as dents or bent fins, which could affect performance․ Check all components, including the refrigerant lines, fan, and electrical connections, to ensure they are intact and operational․ If any damage is found, contact the supplier immediately․ Once the unit is inspected, secure it on a level surface to prepare for installation․
5․2․ Mounting the Condenser Unit
Place the condenser unit on a level, stable surface, ensuring it is securely fastened to prevent vibration․ Use a suitable pad or slab to mount the unit, following local regulations and manufacturer guidelines․ Ensure the unit is level and properly aligned to maintain optimal performance․ Maintain clearance around the unit as specified in the manual to allow for proper airflow and service access․ Secure all mounting hardware tightly to ensure stability and safety during operation․
5․3․ Connecting Refrigerant Lines
Connect the refrigerant lines between the condenser and air handler, ensuring proper sizing and insulation․ Use refrigerant-grade copper tubing and seal connections tightly to prevent leaks․ Inspect lines for damage or debris before installation․ After connecting, conduct a leak test and vacuum test to ensure system integrity․ Properly insulate lines to minimize energy loss and maintain efficiency․ Follow manufacturer guidelines for bending and routing to avoid damage․
Air Handler Installation
Secure the air handler indoors, ensuring proper leveling and fit within the duct system․ This ensures efficient air circulation and optimal system performance․
6․1․ Preparing the Indoor Site
Before installing the air handler, ensure the indoor site is clear of debris and obstacles․ Check for adequate space to accommodate the unit and necessary clearance for proper airflow․ Verify that electrical and drain connections are accessible․ Ensure the floor is level and sturdy to support the unit’s weight․ Proper preparation ensures a smooth installation and optimal performance of the GSXC7 system․
6․2․ Installing the Air Handler
Place the air handler in the prepared indoor site, ensuring it is secure and level; Install mounting brackets or pads as specified in the manual to prevent vibration and ensure stability․ Connect the drain line properly to avoid water damage․ Verify that all electrical connections are securely made and meet local codes․ Ensure the unit is plumb and level for proper airflow and performance․ Double-check all fasteners and connections to guarantee a safe and efficient installation․
6․3․ Connecting Ductwork
Ensure the ductwork is properly sized and compatible with the air handler․ Securely connect the supply and return ducts, sealing all joints with approved materials to prevent leaks․ Insulate ducts in unconditioned spaces to minimize energy loss․ Verify that all connections are airtight and meet local building codes․ Test the duct system for leaks before finalizing the installation․ Proper ductwork connection is critical for efficient airflow, system performance, and energy efficiency․
Refrigerant Charging
Refrigerant charging requires precision to ensure optimal system performance․ Only qualified HVAC technicians should perform this task, following manufacturer guidelines and safety protocols strictly to avoid hazards․ Always use appropriate tools and ensure the system is leak-free before charging․ Proper refrigerant levels are crucial for efficiency and preventing damage to the unit; Refer to the manual for specific charging procedures and recommendations․ Safety and accuracy are paramount in this critical step․
7․1․ Charging Procedures
Refrigerant charging must be performed by qualified HVAC technicians to ensure proper system operation․ Begin by evacuating the system to remove moisture and air, then carefully add refrigerant according to the manufacturer’s specifications․ Use a manifold gauge set to monitor pressure levels and ensure the correct charge amount․ Overcharging or undercharging can lead to reduced efficiency or system damage․ Refer to the manual for exact procedures and safety precautions to avoid hazards․ Proper charging is critical for optimal performance and longevity of the GSXC7 system․
7․2․ Checking for Leaks
Leak detection is crucial for ensuring the GSXC7 system operates efficiently and safely․ Use an electronic leak detector to identify any refrigerant leaks, especially around joints and connections․ Apply soapy water to suspect areas to detect smaller leaks․ Always perform leak checks after refrigerant charging and before system startup․ Only qualified technicians should conduct these tests to ensure accuracy and safety․ Refer to the manual for detailed procedures to prevent system damage or performance issues․
7․3․ Adjusting Refrigerant Levels
Adjusting refrigerant levels in the GSXC7 system requires precision to ensure optimal performance․ Use a manifold gauge set to measure low and high-pressure sides․ Compare readings with manufacturer specifications․ Add refrigerant slowly, monitoring pressure to avoid overcharging․ Ensure the system operates within recommended ranges for efficient cooling and energy savings․ Always follow safety guidelines and consult the manual if uncertain․ Proper refrigerant levels are crucial for system longevity and performance․
Electrical Connections
Secure all connections to prevent electrical hazards․ Ensure power is off before starting work․ Follow wiring diagrams in the manual for correct installation․ Use proper gauge wires․
8․1․ Wiring Requirements
Ensure all wiring meets local electrical codes and Goodman GSXC7 specifications․ Use appropriate gauge wires for safe and efficient power supply․ Follow the provided wiring diagrams in the manual to connect the control board and outdoor unit․ Verify that all connections are secure and properly insulated to avoid electrical hazards․ Power must be disconnected at the main breaker before starting any work․ Consult a qualified electrician if uncertain․
8․2․ Connecting the Control Board
Connect the control board according to the wiring diagram provided in the manual․ Ensure all wires are securely fastened to their respective terminals․ Match the wire colors to the correct connections for power, communication, and sensors․ Verify that the control board is powered correctly and all safety features are enabled․ Double-check connections to avoid system malfunctions or electrical hazards․ If unsure, consult a qualified HVAC technician or the manual for specific instructions․
Proper control board connections are critical for system operation and safety․ Always follow the manufacturer’s guidelines to ensure reliable performance and avoid potential damage to the unit․
8․3․ Testing Electrical Connections
After connecting the electrical components, test all connections to ensure proper functionality․ Use a multimeter to verify voltage levels and continuity․ Check for any short circuits or loose connections, which can cause system malfunctions․ Ensure all wires are securely fastened to their terminals and that there are no exposed wires․ Turn on the power and test each circuit to confirm it operates as intended․ If any issues are detected, consult the manual or a qualified technician for troubleshooting․
- Always disconnect power before performing tests․
- Verify that all safety features are enabled․

System Startup and Testing
Power on the system and check for smooth operation․ Verify proper airflow, temperature settings, and refrigerant flow․ Ensure all components function efficiently and reliably․
9․1․ Initial System Startup
After completing the installation, turn on the power and thermostat․ Verify the system operates smoothly, with proper airflow and cooling․ Check for unusual noises, leaks, or vibrations․ Ensure the condenser and air handler function correctly․ Monitor temperature settings and refrigerant flow․ If issues arise, refer to the troubleshooting section or consult a qualified technician․ Proper startup ensures optimal performance and longevity of the GSXC7 system․
9․2․ Performance Testing
After the initial startup, conduct performance testing to ensure the system operates efficiently․ Check airflow, temperature settings, and refrigerant flow․ Verify the system meets the specified SEER2 ratings and operates quietly․ Use specialized tools like digital thermometers and anemometers to measure performance accurately․ Compare results with manufacturer guidelines to ensure optimal functionality․ Address any discrepancies immediately to maintain system efficiency and reliability․ Proper testing confirms the GSXC7 system delivers the expected performance and energy savings․
9․3․ Troubleshooting Common Issues
Common issues during system operation may include refrigerant leaks, improper cooling, or electrical malfunctions․ Always refer to the manual for diagnostic procedures․ Check refrigerant levels, verify proper electrical connections, and ensure airflow is unobstructed․ If the system fails to cool, inspect the thermostat settings and condenser unit for blockages․ Addressing these issues promptly ensures optimal performance and prevents further complications․ Consult a qualified technician if problems persist or if advanced troubleshooting is required․

Maintenance and Upkeep
Regular maintenance ensures optimal performance and extends the unit’s lifespan․ Clean filters, inspect refrigerant lines, and check electrical connections․ Schedule annual professional inspections for best results․
10․1․ Routine Maintenance Tasks
Perform routine maintenance to ensure the GSXC7 operates efficiently․ Clean or replace air filters monthly to maintain airflow and system performance․ Inspect the condenser coil regularly and clean it as needed to prevent dust buildup․ Check refrigerant lines for leaks and ensure proper insulation․ Verify electrical connections are secure and tighten any loose wires․ Schedule professional inspections annually to address potential issues before they escalate․
10․2․ Cleaning the Unit
Clean the GSXC7 unit regularly to maintain efficiency and performance․ Turn off power before cleaning․ Remove debris from the condenser coil using a soft brush or garden hose․ Avoid damaging the fins with harsh chemicals or abrasive tools․ Replace or clean air filters monthly to ensure proper airflow․ Check drain lines for blockages and clear them if necessary․ Regular cleaning prevents dust buildup and ensures optimal operation․ Schedule professional cleaning annually for internal components to maintain system longevity․
10․3; Best Practices for Longevity
To ensure the GSXC7 system operates efficiently and lasts longer, maintain proper installation techniques and use genuine replacement parts․ Regularly inspect and clean components to prevent dust buildup․ Monitor system performance and address issues promptly․ Schedule annual professional inspections to identify potential problems early․ Keep the unit protected from extreme weather conditions and ensure proper airflow around the condenser․ By following these practices, you can extend the system’s lifespan and maintain its energy efficiency and reliability over time․

Warranty Information
The GSXC7 warranty requires registration within 60 days of installation, excluding California, Florida, and Québec․ Coverage details and limitations are outlined in the manual for reference․
11․1․ Registration Requirements
Ensure the GSXC7 system is registered within 60 days of installation to activate the warranty․ Online registration is mandatory, except in California, Florida, and Québec․ Provide the model and serial numbers, along with the installation date․ Failure to register may reduce warranty coverage․ Check the manual for specific regional requirements and exemptions․ Proper registration ensures full warranty benefits and protects your investment in the GSXC7 system․
11․2․ Warranty Coverage Details
The GSXC7 system offers a comprehensive warranty program, providing coverage for parts and labor under specific conditions․ The warranty period varies by component, with most parts covered for up to 10 years․ Labor costs are typically covered for a shorter duration and only if the system is registered․ Proper installation by a licensed technician is mandatory for warranty validity․ Regional variations may apply, particularly in Texas and Florida․ Ensure compliance with all terms to maintain full coverage benefits․
11․3․ Exclusions and Limitations
The warranty does not cover damages due to improper installation, misuse, or failure to follow instructions․ Claims arising from natural disasters, fire, or third-party actions are excluded․ Unregistered units may void coverage․ Regional restrictions apply, particularly in Texas and Florida․ The warranty does not cover routine maintenance tasks or normal wear and tear․ Any modifications or repairs not authorized by Goodman will invalidate the warranty․ Coverage is subject to compliance with all terms and conditions outlined in the warranty agreement․
Proper installation and adherence to this manual ensure optimal performance and longevity of your GSXC7 unit․ By following guidelines, you achieve reliable, efficient cooling and minimize potential issues․
12․1․ Final Checklist
- Verify all electrical connections are secure and properly insulated․
- Ensure refrigerant levels are correctly charged and leak-free․
- Confirm ductwork is properly sealed and connected․
- Test system performance to ensure optimal cooling and efficiency․
- Register the unit for warranty coverage within 60 days․
- Schedule routine maintenance for long-term reliability․
Completing these steps ensures a safe and efficient installation, maximizing system performance and longevity․
12․2․ Importance of Proper Installation
Proper installation is crucial for the GSXC7 system to ensure optimal performance, safety, and efficiency․ Improper installation can lead to reduced efficiency, higher energy costs, and potential safety hazards․ By following the manual’s guidelines, you guarantee reliable operation and longevity of the unit․ Proper installation also ensures compliance with safety standards and warranty requirements․ Always rely on qualified professionals to handle the installation process for the best results and to avoid costly repairs or system malfunctions․
12․3․ Future Service Recommendations
Regular maintenance and timely service are essential for the GSXC7 system to maintain its efficiency and performance․ Schedule annual professional inspections to identify and address potential issues early․ Clean filters and coils regularly to ensure optimal airflow and energy efficiency․ Keep the system free from debris and obstructions․ Additionally, stay updated with manufacturer recommendations and adhere to the warranty guidelines for extended system longevity and reliability․ Proper care ensures continued comfort and energy savings for years to come․