Discover durable and versatile heavy-duty workbench plans with step-by-step guides, perfect for woodworking, repairs, and mechanical tasks․ These designs ensure stability and long-lasting performance for any project․
Why a Heavy-Duty Workbench is Essential for Your Workshop
A heavy-duty workbench is a cornerstone of any productive workshop, offering unparalleled support for heavy loads and demanding tasks․ Its robust construction ensures durability, making it ideal for woodworking, mechanical repairs, and other intensive projects․ Unlike standard workbenches, heavy-duty designs are built to withstand constant use and harsh conditions, providing a stable and reliable workspace․ They often feature reinforced frames and high weight capacities, ensuring safety and efficiency․ Whether you’re assembling large machinery, handling heavy tools, or tackling complex woodworking, a heavy-duty workbench delivers the strength and stability needed for professional-grade results․ It’s not just furniture—it’s a long-term investment in your workshop’s productivity and safety․
Overview of Heavy-Duty Workbench Plans Available Online
Online, you can find a wide variety of heavy-duty workbench plans to suit different needs and skill levels․ These plans range from simple, budget-friendly designs to complex, customizable models․ Many websites offer free PDF downloads with detailed step-by-step instructions, while others provide premium plans with advanced features like adjustable shelves and drawers․ Whether you’re a DIY enthusiast or a professional, there’s a plan available to match your workspace requirements․ These designs often include material lists, cutting guides, and assembly tips, ensuring a smooth building process․ With so many options, you can easily find a plan that balances durability, functionality, and cost․

Materials and Tools Required
Building a heavy-duty workbench requires sturdy materials like 2×4 lumber, screws, and nails․ Essential tools include a drill, saw, and wrench for secure assembly․
Essential Lumber and Hardware for a Sturdy Workbench
Building a heavy-duty workbench requires robust materials to ensure durability․ Start with 2×4 or 2×6 lumber for the legs and frame, providing a solid foundation․ Use 3/4-inch plywood or MDF for the workbench top to withstand heavy loads․ Reinforce the structure with steel brackets or corner brackets for added stability․ Essential hardware includes galvanized screws, bolts, and washers to secure all components tightly․ Consider adding caster wheels for mobility and heavy-duty shelf supports for extra storage․ Proper materials ensure your workbench remains stable and withstands frequent use․ Always opt for high-quality lumber and hardware to maximize longevity․
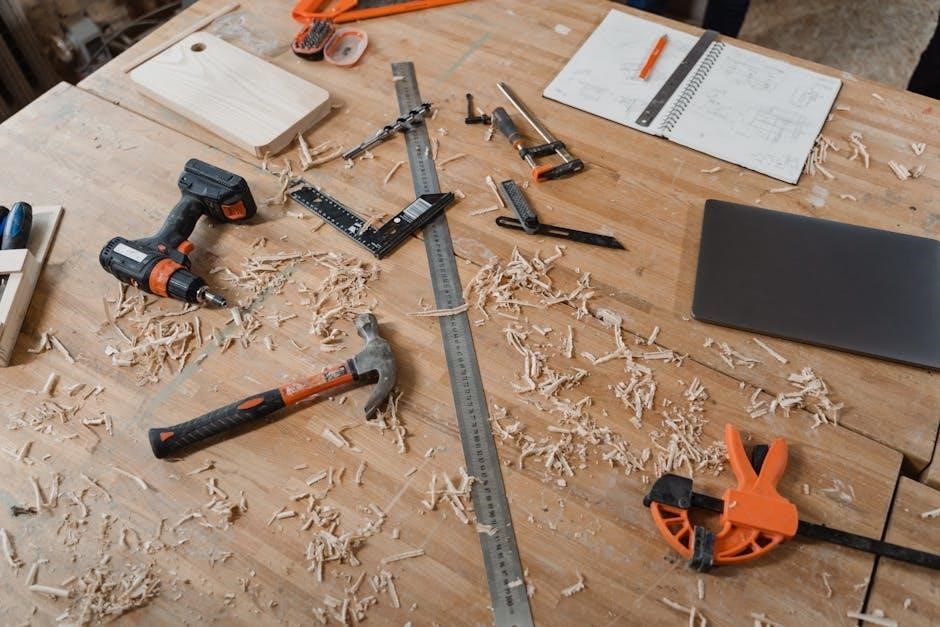
Basic Tools Needed for Assembly
Assembling a heavy-duty workbench requires a set of essential tools to ensure accuracy and efficiency․ A drill press or cordless drill is necessary for drilling precise holes and driving screws․ An impact driver or wrench is ideal for tightening bolts and large fasteners․ Measuring tools like a tape measure, square, and level are crucial for ensuring all components are aligned and properly fitted․ Clamps, such as F-clamps or bar clamps, will help hold the workbench top and frame securely during assembly․ Safety gear, including gloves and safety glasses, is also essential to protect yourself while working with power tools and heavy materials․ Having these tools on hand will streamline the assembly process and ensure a sturdy, professional-grade workbench․

Design Considerations
When designing a heavy-duty workbench, prioritize size, weight capacity, and optional features like shelves or drawers for optimal functionality and workspace efficiency․
Choosing the Right Size for Your Workbench
Selecting the correct dimensions for your heavy-duty workbench is crucial for functionality․ Consider your workspace and the size of projects you’ll handle․ A standard workbench typically measures between 30 to 36 inches in height, allowing comfortable standing or seating․ The length and width should accommodate tools and materials without overcrowding․ For instance, a 60-inch length and 24-inch depth provides ample space for most tasks․ Ensure the workbench fits your garage or workshop, leaving enough room to move around․ Customizable plans allow adjustments to suit specific needs, ensuring efficiency and comfort during use․
Weight Capacity and Durability Features
Heavy-duty workbenches are designed to handle substantial loads, often supporting up to 400 pounds or more․ Durability is achieved through robust materials like 2×4 lumber and steel hardware․ Reinforced frames and a solid work surface ensure stability and eliminate wobble․ These workbenches are ideal for heavy mechanical tasks, woodworking, and repairs․ The sturdy construction prevents bowing under pressure, making them reliable for demanding projects․ Adjustable height settings further enhance functionality, allowing customization to suit different work styles․ These features ensure the workbench remains a long-lasting, dependable addition to any workshop or garage․
Optional Features: Shelves, Drawers, and Vises
Enhance your heavy-duty workbench with practical add-ons like shelves, drawers, and vises for improved functionality․ Shelves provide ample storage for tools and materials, keeping them within easy reach․ Drawers offer a convenient space to organize small parts and accessories, reducing clutter․ Vises are essential for securing objects during tasks like cutting or sanding, ensuring precision and safety․ These optional features allow customization to meet specific needs, whether for woodworking, mechanical work, or other projects․ By incorporating these elements, your workbench becomes a versatile and efficient workspace tailored to your workflow․

Step-by-Step Assembly Guide
Follow a detailed guide to build your heavy-duty workbench, ensuring durability and functionality for all your projects․ Start with preparing legs, then build the top, assemble the frame, add shelves, and make final adjustments․
Step 1: Preparing the Legs and Supports
Begin your project by cutting the workbench legs and supports to the desired measurements․ Use durable lumber like 2x4s or 4x4s for added strength; Ensure all cuts are precise to maintain stability․ Sand the edges to prevent splintering․ Assemble the legs using heavy-duty bolts or screws, creating a sturdy base․ Attach horizontal supports between the legs for additional rigidity․ This foundation is crucial for the workbench’s overall stability and weight capacity․ Make sure the legs are level and evenly spaced to provide a solid base for the workbench top and shelves․ Proper preparation here ensures a durable and long-lasting workbench․
Step 2: Building the Workbench Top
Next, focus on constructing the workbench top, which is crucial for durability and functionality․ Cut your chosen material, such as thick plywood or MDF, to the specified dimensions․ Sand the surface to ensure it’s smooth and even․ For added strength, consider gluing and clamping multiple layers together․ Once dry, attach the top to the legs using heavy-duty screws or bolts․ Ensure the top is level and securely fastened to the frame․ A sturdy workbench top is essential for withstanding heavy loads and providing a reliable workspace for your projects․ Proper alignment and a smooth finish will enhance usability and longevity․
Step 3: Assembling the Frame and Stretchers
After preparing the legs and supports, the next step is to assemble the frame and stretchers․ Begin by cutting the frame pieces according to your plan, ensuring precise measurements for a sturdy structure․ Use a drill and wrench to secure the sides and front/back rails together with heavy-duty bolts․ Next, attach the stretchers between the legs to add lateral stability and prevent racking․ Tighten all connections firmly to create a rigid frame․ The stretchers play a crucial role in reinforcing the workbench’s stability, especially under heavy loads․ Ensure all components are aligned properly and the frame is square before moving on․ A well-assembled frame and stretchers will provide the foundation for a durable and reliable workbench․
Step 4: Adding Bottom Shelves and Support
With the frame assembled, focus on adding the bottom shelves and support․ Cut the shelf boards to size and attach them to the frame using screws or bolts․ Ensure the shelves are evenly spaced and aligned with the frame’s edges for a clean finish; Install additional support brackets or beams underneath the shelves to enhance structural integrity․ Tighten all fasteners securely to prevent any movement or sagging․ This step not only provides extra storage for tools and materials but also reinforces the workbench’s overall stability, making it capable of handling heavier loads․ Properly installed shelves and supports will ensure your workbench remains durable and functional for years to come․
Step 5: Final Assembly and Adjustments
Once the shelves and supports are in place, proceed to the final assembly․ Attach the workbench top securely to the frame using bolts or screws, ensuring it is flush and evenly aligned․ Check the entire structure for levelness and stability; use shims if necessary to balance the bench․ Tighten all connections firmly to avoid any wobbling․ Finally, add any optional features like vises or drawers, following the specific instructions for each component․ Double-check all measurements and ensure every part is properly aligned and secured․ This step completes your heavy-duty workbench, ready for years of reliable service in your workshop or garage․

Safety Tips and Best Practices
Ensure stability and levelness for safe use․ Use proper clamps and fasteners to avoid accidents․ Always wear protective gear and follow assembly instructions carefully․
Ensuring Stability and Leveling
Stability is crucial for a heavy-duty workbench․ Begin by ensuring the workbench legs are even and the surface is level․ Use shims or adjustable feet if necessary to compensate for uneven floors․ A level workbench prevents tools from slipping and ensures accurate measurements․ For added stability, secure the bench to the floor using anchor bolts, especially in workshops with high activity․ Regularly check the levelness after assembly and adjust as needed․ Proper leveling and stability not only enhance safety but also improve the overall functionality of the workbench, making it a reliable workspace for all projects․
Using Proper Clamps and Fasteners
Using proper clamps and fasteners is essential for securing materials and ensuring safety while working․ Invest in high-quality clamps, such as F-style or C-style clamps, to hold heavy materials firmly in place․ For assembly, use bolts and lag screws instead of ordinary screws for maximum strength․ Tighten all connections thoroughly to prevent wobbling or loosening over time․ Avoid over-tightening, as this could damage the workbench frame․ Always pre-drill holes to prevent splitting the wood․ Proper clamping and fastening techniques ensure a sturdy and reliable workbench, reducing the risk of accidents and improving overall workflow efficiency in your workshop․

Budget-Friendly Options
Explore budget-friendly options for building a heavy-duty workbench, including free PDF plans, cost-effective materials, and smart shopping strategies to save money without compromising quality or functionality․
Free PDF Plans vs․ Premium Designs
When choosing between free PDF plans and premium designs, consider your needs and budget․ Free plans offer basic, functional designs with step-by-step instructions, ideal for DIY enthusiasts․ They often include shopping lists and diagrams, making them accessible for beginners․ Premium plans, however, provide advanced features like customizable layouts, detailed cut lists, and engineer-verified structures for maximum durability․ While free plans save money, premium options are worth the investment for heavy-duty applications or unique workshop requirements․ Both options are widely available online, catering to different skill levels and project goals․ Choose based on your specific needs for the best results․
Cost-Effective Materials for Heavy-Duty Workbenches
Building a heavy-duty workbench doesn’t have to break the bank․ Opt for cost-effective materials like sturdy plywood or oriented strand board (OSB) for the top, paired with solid 2×4 lumber for the frame․ These options provide exceptional strength at a lower cost․ Steel legs or reinforcements can add durability without significant expense․ Hardware such as screws, bolts, and brackets should be heavy-duty to ensure stability․ Reclaimed or recycled wood is another budget-friendly choice for non-critical components․ By selecting these materials, you can construct a professional-grade workbench that withstands heavy use while staying within your budget․ This approach ensures a balance between quality and affordability for your workshop needs․
Building a heavy-duty workbench using these plans ensures a durable and versatile workspace․ With clear guides and cost-effective materials, your workshop will be equipped for years of reliable use․
Final Thoughts on Building Your Heavy-Duty Workbench
Constructing a heavy-duty workbench is a rewarding project that enhances your workshop’s functionality․ With free PDF plans available, you can create a sturdy, long-lasting work surface tailored to your needs․ These plans often include detailed instructions, shopping lists, and diagrams, making the process accessible even for beginners․ By using durable materials and following the steps carefully, you’ll have a reliable workspace for woodworking, repairs, and other heavy tasks․ The ability to customize the design ensures your workbench fits perfectly into your workshop, providing years of reliable service and supporting your creative and practical projects effectively․
Resources for Further Customization
For those seeking to enhance their heavy-duty workbench, numerous online resources offer customization ideas․ Websites provide free PDF plans with adjustable features like shelves, drawers, and vises․ Premium plans often include advanced designs with re-engineered structures for added durability․ Additional hardware, such as heavy-duty shelf supports and caster wheels, can be incorporated to improve functionality․ Tutorial videos and forums also offer tips for modifying existing plans to suit specific needs․ Whether adding storage or mobility, these resources empower users to create a workbench that perfectly aligns with their workshop requirements and personal preferences, ensuring optimal performance and versatility․